
Anyone else dreaming of summer? Living in Vancouver, it’s been rain errryday and the Huz said that I’m not allowed to check the weather anymore. Well, for my friend’s birthday, I thought I’d bring her some summer. And since she has 2 adorable kiddies, I thought they’d like a fun whimsical cake.
My inspiration for this cake is Katherine Sabbath. Have you seen her work??? Mind blowing. Not only are her designs amazing, her flavor combinations are out of this world. I’m pretty much in awe of her. Check this out:
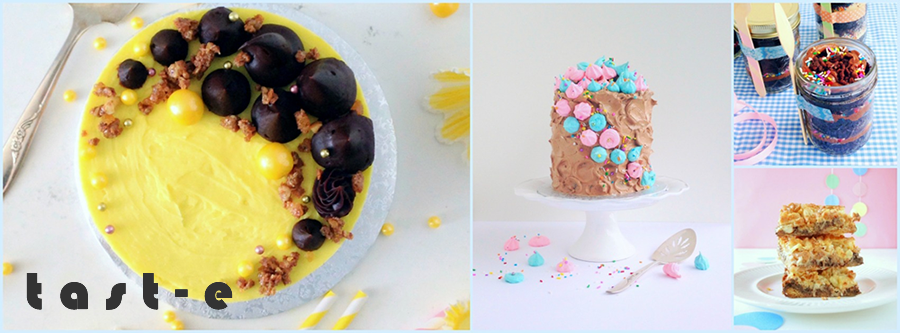
Here’s what I’ve done for my friend in the past:
I always try to do something big and different for her. It keep me on my game keeps me flexing my muscles.
Here’s my technique for decorating this cake. I’m not including a recipe for the cake itself - I did a vanilla cake with raspberry jam - because I wanted to focus on the decor. And lucky for you, I’ve worked out the kinks (trust me, there were some tears, right Huz?).

Ice Cream Fake Out Cake Decor
Buttercream Frosting - for sprinkle layer and “ice cream”
Ingredients
1.5 cups butter, softened (add ¼ teaspoon salt if using unsalted butter)
5 cups icing sugar
½ cup heavy cream, room temperature (nuke in the microwave in a time pinch)
2 teaspoons vanilla
¼ teaspoon almond extract
¼ cup jimmies sprinkles
2 Tablespoons chopped chocolate
1 Tablespoon raspberry jam
Food colouring of choice (I used a mix of blue and green gel)
Ice Cream Cone
Ingredients
1 sugar cone
¼ cup white chocolate, or white chocolate discs, or candy melts
¼ cup sprinkles or nuts or anything you want to decorate the ice cream cone with
Drip Icing
Ingredients
½ cup icing sugar
3-4 teaspoons water
Food colouring of choice (I recommend gel colour)
Tools
Large and mini ice cream scoops
Metal spatula
Piping bag


Decorating instructions
- Make buttercream frosting by whipping butter (and salt if using) with beater attachment in a stand mixer until fluffy. Add icing sugar and mix on a low speed. Gradually stream in cream as it’s mixing and beat until well incorporated and fluffy. Add vanilla and almond extract and beat until incorporated.
- Stack and fill your cake layers. I baked a vanilla cake in 3, 6-in cake pans and sliced them in half. In between the layers, I used raspberry jam. But sky’s the limit here in terms of flavour combos.
- Crumb coat the cake - apply a thin layer of frosting to the entire cake to seal in the crumbs. Scrape off any excess. Place in the fridge for 10 minutes.
- At this point, you’ll need to estimate how much frosting you’ll need for the sprinkle layer and the “ice cream” portions. Scoop out the amount that you’ll need for the “ice cream” into a bowl and set aside.
- With the portion of frosting you’ve portioned for the sprinkle layer, add sprinkles and fold in with a spatula. Feel free to add more if you want it extra sprinkl-y.
- Frost the cake with your sprinkle frosting and scrape off excess. If you want it extra smooth, put it in the fridge for 10 minutes. Dip a metal spatula in hot water and wipe off, and smooth out the frosting. You can add more frosting and repeat this process of refrigerating and smoothing out with a hot spatula.
- Next, colour the frosting that you will use as ice cream. In my design, I made a turquoise large scoop and smaller scoops of chocolate chip and raspberry ripple. For turquoise, I mixed blue and a small amount of green into the frosting. For chocolate chip, I chopped up chocolate and mixed it into the frosting. For raspberry ripple, I added 1 tablespoon of raspberry jam into the frosting and ran a few strokes through it with a spoon. And for the important part: Spread out the frosting on the bottom of their bowls and refrigerate for 10 minutes. This will give it the ice cream look when scooped out.
- In the meantime, you can do 2 things: decorate your ice cream cone and make your drip. First the cone: melt your white chocolate in a double boiler or in 10 second intervals in the microwave, stirring between intervals. Dip your the outer 1-inch of your cone in the melted chocolate, then dip in sprinkles or nuts. Place on parchment/wax paper/foil and harden in the fridge.
- Next the drip icing: Place icing sugar in a small bowl and add water 1 teaspoon at a time, stirring after each addition. Stop when you get a thick but fluid consistency. I recommend putting a drop of the icing on the lip of a cup to see how fast it drips down. If you’ve added too much water, you can add more icing sugar. Add food colouring and mix to incorporate (I recommend gel colour so that it doesn’t add more liquid to the drip).
- Apply the drip icing: I’ve seen this done in a number of ways, but here’s what I did - I put some of the drip icing in a small pastry bag with a small round tip. I applied beads of drip icing on the edge of the cake and allowed it to drip down. I put the remaining drip on top of the cake and spread it out with an offset spatula.
- Apply the “ice cream”: Scoop the ice cream frosting with an ice cream scoop and place on the cake. If the frosting is too hard, you can run the scoop under hot water (be sure to dry with towel before scooping). Place ice cream cone on the middle ice cream.
- Keep cake in the fridge. Bring up to room temperature before eating - 2 hours prior.
*What to do with extra frosting and cake: If you’ve found yourself with extra cake scraps from cutting off the dome of the cakes and frosting, why not make cake pops or cake truffles! You can keep both the cake scraps and frosting in the freezer until you’re ready to make these. I’ll do a post on this next!

Verdict: This cake was an absolute show stopper! I was really happy with the way it turned out and how much it resembled ice cream! Such a whimsical cake. I have so many ideas of how this ice cream technique can be used!
Ps. Does this remind of you Baskin Robins of the 90’s? I got a few of those comments.