Monday 13 October 2014

Star Wars Cake


Guess what? One month to my wedding. We’ve been really busy with the final details and most of the things are done. Everyone is super excited, but is it OK that I’m not? We’ve been planning it for a year, so I’m kind of done. And I feel kind of guilty for feeling this way. Anyone else felt like this? Hopefully I get a second wind and get excited closer to the date!

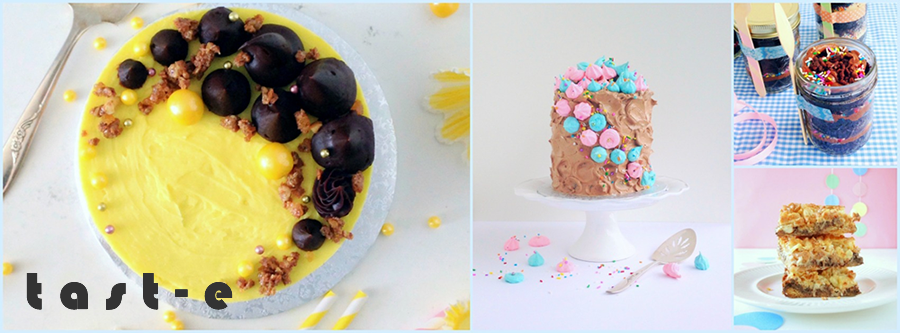
In the meantime, there are a bunch of baking projects. One is a Star Wars cake for a now 6 year old (What? When did that happened??) boy. I’ve made these cupcakes and this cake for him in the past. This year he requested a vanilla Start Wars cake, which was a bit challenging because I know nothing about Star Wars. And I wanted to make a version that didn’t use fondant. Here’s the final cake! I hope he likes it!!!

Star Wars Cake
Vanilla Funfetti Cake
I used this Vanilla Buttermilk Cake originally from Sky High: Irresistible Triple-Layer Cakes 
I tossed some sprinkles on the cake batter after pouring in the baking pans and swirled it with a butter knife.

Whipped Vanilla Pudding Buttercream
Ingredients
1 vanilla pudding cup
1 ½ cups butter, room temperature
6 cups icing sugar
1 teaspoon vanilla
Blue and yellow gel food colouring

Directions
1. Combine butter, icing sugar, and vanilla pudding cup in the bowl of a stand mixer and beat with a paddle to combine.
2. Add vanilla and beat on high until fluffy.
3. Divide into 3: about 1 cup for the filling, 1/3 cup for the label and stars (yellow), and the remaining for the outer layer (blue). Add food colouring and whip until smooth and blended.


Assembly
Fill the layers with white frosting. Crumb coat the entire cake with blue frosting. Use the yellow frosting to pipe stars and the Star Wars label.
*I made a stencil for the Star Wars label with acetate. I first placed the cake in the freezer for 15 minutes, then placed the stencil on the cake and smeared the yellow frosting over top. I put it back in the freezer for about 5 minutes before carefully removing the stencil.

Smearing buttercream on my stencil.


Verdict: This is my go to recipe for vanilla cake. Dense but fluffy and moist – a very pleasant texture. The frosting was a bit sweet for my liking, but an American style buttercream crusts (as opposed to Swiss Meringue Buttercream), which I needed for a smooth and sturdy cake. I was happy with the way the stenciled label turned out. Yay, no fondant needed!

Sunday 5 October 2014

Macarons


I have made these before. And it’s never worked. Cracks, dull, no feet fails. And then it happened. It started to work. And although they’re not perfect yet, my macaron making mind is revitalized!
So macarons are supposed to have a shiny shell, with feet (not separated or collapsed), non-hollow shells, and a balanced amount of filling. That’s a lot of characteristics that can go wrong. These aren’t nearly there yet, but since they are starting to work for me, I thought I’d share. Btw, the key to delicious macarons: ripen in fridge for 24 hours before consuming. Makes a world of difference.

Macarons
An amalgamation of this and this recipe.

Ingredients
1 cup icing sugar
¾ cup almond flour/meal
2 large egg whites
1/8 teaspoon cream of tartar
¼ cup sugar
1 teaspoon vanilla
Gel food colouring

Directions
1.   Line two baking sheets with parchment.
2.   Sift icing sugar and almond flour together into a bowl.
3.   Wipe the inside of a metal bowl and whisk with vinegar. Whip egg whites until frothy. Add cream of tartar and whip to soft peaks.
4.   Gradually add sugar while beating. Whip to very stiff peaks.
5.   Add vanilla and gel food colouring and whip to mix.
6.   Dump sugar-almond mixture into meringue. Set timer for 30 seconds and mix with a spatula to deflate the air.
7.   Start folding and test periodically so that if you hold the spatula up, ribbons flow off of it and gradually disappear into the batter.
8.   Put the batter in a piping bag with round tip. Pipe fairly small rounds on the parchment lined baking sheets. Remember, they spread out a bit, so try not to pipe too big.
9.   Hold baking sheet and bang on counter 2 times each to release bubbles.
10. Pre-heat oven to 300 degrees F. Let the macarons sit and form a shell as the oven is pre-heating. 15-30 minutes.
11. Bake for 10-12 minutes until the shells easily release for parchment. Cool on tray before releasing.
 
Before adding almond flour.

Strawberry Lemon Filling
½ cup butter, room temperature
2 cups icing sugar
3 Tablespoon seedless strawberry jam
½ teaspoon lemon flavouring
2 Tablespoon cream

Directions
Beat all ingredients until smooth. Adjust strawberry jam to taste. Add more cream for smoother texture.

Chocolate Buttercream Filling
¼ cup chopped chocolate
½ cup butter, room temperature
1 cup icing sugar
1 Tablespoon cocoa
1-2 Tablespoons cream

Directions
Melt chocolate over a double boiler. Take off heat and cool so that it won’t melt the butter, but is still smooth. Combine butter and sugar in a bowl. Sift in cocoa. Beat until combined. Add melted chocolate and beat until smooth. Add cream until you get the consistency you like.

Assembly
Pipe filling onto a shell and sandwich with another. Place in a container and leave in the fridge for 24 hours before bringing back up to room temperature to eat.


Verdict: The strawberry lemon macarons were delicious. The chocolate buttercream macarons were a tad sweet. I’ll have to adjust the recipe. Back to the kitchen to practice.

Btw, the next batch cracked horribly. Anyone know how to make macarons when it’s humid??