Sunday 29 January 2012

Momofuku’s Cornflake Chocolate Chip Marshmallow Cookies - adapted


(one of) The main reason I want to visit New York is to eat at Momofuku’s Milk Bar.  They’re desserts look like they’re out of this world creative and awesome!  Crack pie, cereal milk soft serve, cinnamon bun pie?!!!  Needless to say that I super want the cook book.  In the meantime, I’ve found some of their recipes online, which I'm excited to try out.  First on the list is the Cornflake Chocolate Chip Marshmallow Cookie.  This cookie, as with all their recipes, is a multi-step, time consuming process.  I’ve altered the recipe based on the comments made by others who have made it – reduced the sugar and butter and used chocolate chunks instead of chips.

Check out the verdict at the end of the post!

Cornflake Chocolate Chunk Marshmallow Cookies
Adapted from here.
Makes 20.

Make Cornflake Crunch first
Ingredients
3 cups cornflakes
¼ cup milk powder
2 Tablespoon sugar
¼ cup melted salted butter

Directions
1.       Heat oven to 275 degrees F.  Line baking sheet with parchment paper or silicon baking mat.
2.       In a medium bowl, crush cornflake to large crumbs.
3.       Add milk powder and sugar and mix.
4.       Add melted butter and toss to coat.
5.       Spread onto the baking sheet and bake for 20 minutes or until toasted.
6.       Cool before adding to cookie batter.
Cornflake crunch after baking.

Cookie recipe
Ingredients
½ cup room temperature salted butter
¾ cup sugar
1/3 + 2 Tablespoons tightly packed brown sugar
1 egg
1 teaspoon vanilla syrup or ½ teaspoon vanilla extract
1 ½ cups bread flour
½ teaspoon baking powder
½ teaspoon baking soda
½ teaspoon salt
3 cups Cornflake Crunch
2/3 cup dark chocolate chunks
1 ¼ cup mini marshmallows

Directions
1.       In a large bowl, cream butter and both sugars with a beater on medium high for 2-3 minutes.
2.       Add egg and vanilla, and beat for 7-8 minutes.
3.       Add flour, baking powder, baking soda, and salt, and mix on low just until dough comes together (1 minute).
4.       Add cornflakes and chocolate chunks and mix just until incorporated (30 seconds).
5.       Mix in marshmallow and mix just until incorporated (30 seconds).  Dough may be crumbly.
6.       Cover bowl with plastic wrap and refrigerator for 24 hours.
Cornflake and chocolate.

Batter ready for the fridge.
To bake:
7.       Preheat oven to 375 degrees F.  Line baking sheet with parchment or baking mat.
8.       Pack dough into a medium/large ice cream scoop.  Place on baking sheet 4 inches apart.  If the dough crumbles, gather it into a pile (as it bakes, the batter will incorporate the crumbs).
9.       Bake for 13 minutes.  Cool on baking sheet before moving to a rack. Keep dough in refrigerator between bakes.  Do not bake room temperature cookie dough.
Before baking.

After baking.


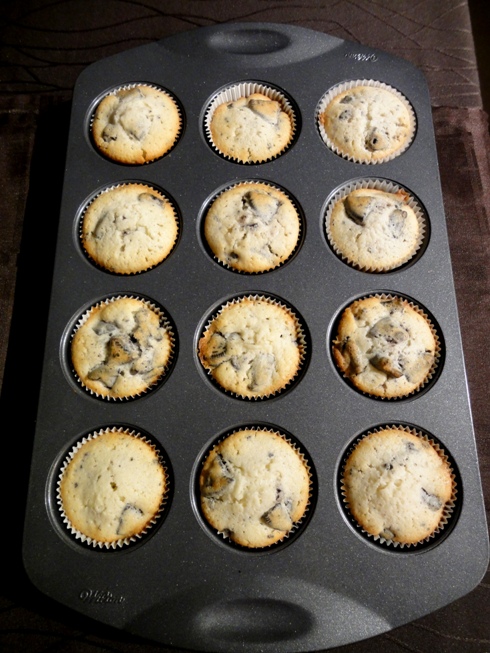
Verdict: These cookies were a hit with everyone, old and young!  They were crunchy and chewy, sweet and salty.  My friend’s picky 3-year old said that they were so yummy!  It was really fun to put all that energy into a cookie and have them turn out great.  Next step – go to New York and try the original!

Sunday 22 January 2012

Homemade Raincoast Crisps


I’ve been feeling like snacking lately, so I’ve been making healthy, but not your ordinary, snacks.  This past week I’ve made crispy roasted chickpeas and homemade popcorn (did you know that you can put popcorn kernels in a brown paper bag and microwave them?!! No more stove top or packaged microwave popcorn for me!!).  This coming week I’ll be making kale chips (everyone seems to be making these – they are all over food galleries e.g. http://foodgawker.com/). 

This weekend, I made raincoast crisps.  If you don’t know what they are click here for the original product.  I never buy these because they are super expensive, so I make them.  I reduced the sugar from the recipe that I found and made sure I added lots of dried fruit for the sweetness.

Check out the verdict at the end of the post!

Raincoast Crisps
Adapted from here.
Ingredients
2 cups flour (I used a combination of whole wheat, spelt, and rye, but the original recipe calls for 1 cup whole wheat and 1 cup all purpose)
2 teaspoon baking soda
½ teaspoon salt
2 cups buttermilk
2 Tablespoon sucanat (or regular sugar)
2 Tablespoon maple syrup or honey
1.5 cups of seeds, nuts, and dried fruit (I used pumpkin seeds, sunflower seeds, sesame seeds, chopped pecans, raisins, dried currants, chopped figs, chopped dried apricots)

Baking Part 1
1.       Preheat oven to 350 degrees F.  Grease and flour 2 loaf pans.
2.       In a large bowl, whisk flour, baking soda, and salt.
3.       Add buttermilk, sugar, and maple syrup and mix.
4.       Gently mix in seeds, nuts, and fruit.
5.       Divide into 2 loaf pans and bake for 37 minutes or until a toothpick comes out clean.
6.       Cool, wrap in plastic wrap, and freeze.

Baking Part 2
1.       When loafs are partially frozen, slice thin and lay on an ungreased cookie sheet.
2.       Bake at 325 degrees F for 15 minutes, flip crisps over, and bake for another 10 minutes.
3.       Cool and store in an airtight container.
Before baking.

After baking.


Before baking the second time.


Verdict: I LOVE these crisps!! I baked one loaf and kept the other in the freezer for another day (when I’m craving snacks).  They are pretty filling because of the hefty flours and not too sweet.  I especially love the crunch!

Sunday 15 January 2012

Cookies and Cream Cupcakes

Another birthday, this time my friend Jerry.  What to make for a guy who has no dessert favorites but is happy with everything?  Last year I made him a black and white cake (see photo below).  This year, I went with another black and white cake, but in cupcake form.  Plus, I’ve been wanting to make a cookies and cream dessert for a while!

Jerry's 2011 birthday cake.

See the verdict at the end of the post!

Cookies and Cream Cupcake
Adapted from here.
Makes 12 cupcakes.

Ingredients
1 pack of Oreo cookies
1 1/8 cup flour and 1 Tablespoon pastry flour
½ teaspoon baking powder
¼ teaspoon salt
½ cup butter – softened
½ and ¼ cup sugar
2 teaspoon vanilla syrup or 1 teaspoon vanilla extract
½ cup buttermilk – room temperature
2 egg whites – room temperature

Directions
1.       Preheat oven to 350 degrees F.  Line a cupcake pan with 12 liners.
2.       Prep Oreos
   a.       Twist 12 Oreos in half and place the side with cream on the bottom of the cupcake liners (cream side up). 
   b.      Cut other half of cookies for later decorations.  Crush the others into a fine crumb to add to frosting.
   c.       Roughly chop 10 Oreo cookies and toss in 1 Tablespoon of flour.  Set aside to fold into batter.
3.       Whisk 1 1/8 cup flour, baking power, and salt in a bowl.  Set aside.
4.       In a separate bowl, whip egg whites to soft peaks.  Gradually beat in ¼ cup sugar until stiff peaks. Set aside.
5.       In a separate bowl, cream butter and ½ cup sugar until fluffy.  Add vanilla and beat to combine.
6.       Add flour to butter mixture in thirds, alternating with buttermilk, starting and ending with flour and beating between additions.
7.       Fold in egg white mixture.
8.       Fold in chopped Oreo cookies.
9.       Spoon into cupcake liners and bake for 20 minutes or until a toothpick comes out clean.

Oreo in the cupcake liners.
Cut the twisted off cookie in half for decorations.

Chop 10 Oreos to fold into batter.

Before baking.

After baking.

Cookies and Buttercream Frosting
In a large bowl, combine 1 cups of butter (softened), 4 cups of icing sugar, 2 teaspoons of vanilla syrup, and 1/4 cup of milk.  Beat until smooth.  Add crushed Oreo cookies (about ¼ cup) and beat until combined.


Ready for delivery!

Verdict: Jerry seemed pretty happy that he got cake for his birthday.  I wasn’t there when he tasted them, but I thought they were super delicious.  The cake is not too sweet, which balances the sweet frosting.  Plus, the cookie at the bottom of the cupcake stays crispy and gives it a change-up in texture.  A success!  I wonder what other cookies I can bake into a cake…
 

Saturday 7 January 2012

Fruit Topped (flan-like) Butter Cake


It was my friend Tina’s birthday. I wanted to make her a cake, but she’s not huge on cakes.  Her favorite cakes are the ones with fruit on top because she loves fruit and usually ends up just eating the fruit.  Since she was having a party and I figured not everyone would be happy just eating fruit – can you picture her blowing out a candle in a piece of fruit? I can’t! Plus don’t people super anticipate a delicious cake at a birthday party? I do! – I figured I had to incorporate a cake into the creation. So, I did a thin layer of cake with raspberries throughout, lemon curd (since I had some from my last post), and lots of fruit.  This turned out to be quite flan-like!

Check out the verdict at the end of the post!

Raspberry Butter Cake
Adapted from here.
 
Ingredients
¾ cup + 2 Tablespoon cake flour
¾ teaspoon baking powder
¼ teaspoon salt
¼ cup + 2 Tablespoon butter, softened
½ cup sugar
1 egg
½ teaspoon vanilla bean paste, or 1 teaspoon vanilla extract
1/3 cup buttermilk
2 Tablespoon sour cream or yogurt
½ cup berries

Directions
1.       Preheat oven to 350 degrees F.
2.       Whisk flour, baking powder, and salt in a bowl and set aside.
3.       In a separate bowl, cream butter and sugar with a beater until fluffy.
4.       Beat in egg and vanilla.
5.       Mix buttermilk and sour cream or yogurt in a cup.
6.       Mix in flour to egg mixture in 3rds, alternating with milk, starting and finishing with flour.
7.       Fold in berries.
8.       Bake in a 9 inch cake pan for 29 minutes or until a toothpick comes out clean.
Before baking.

After baking.

Assembly
1.       Spread lemon curd (or custard) on cake.
2.       Lay out fruits on top in a nice pattern.
3.       Brush on a glaze (I used a store bought glaze – see picture), or heat apricot or apple jelly and use as a glaze.
Store bought glaze.


Verdict: This cake was pretty good and moist.  I’d like to bake it in a loaf pan and try it without the fruit.  It had a really nice vanilla flavor that I think will be delicious on its own.  The birthday girl – as always - picked off and ate the fruit!

Sunday 1 January 2012

Angel Meringue (cup)Cake with Lemon Curd


The boyfriend and I were going to a post-Christmas, pre-New Years potluck with his friends.  We were asked to bring a dessert, so obviously of the two of us, the task was given to me.  I knew that someone was going to bring a cheesecake, so I wanted to bring something that was the opposite of cheesecake. So, what’s the opposite of cheesecake?  I’m thinking a light and fluffy angel food cake – the key to which is whipping up egg whites to stiff peaks and folding in the flour.  Since angel food cakes require a lot of egg whites, I use a carton of just egg whites (like eggbeaters).  Well, this time, I tried whipping up the egg whites, and it wouldn’t whip up…5 times! I finally decided that some yolk accidentally made its way into the carton during the assembly process (since even a drop of fat will keep the egg whites from whipping up), so I bought another carton.  Presto, stiff peaks!  I made cupcakes with the left over batter.

Check out the verdict at the end of the post!

Angel Food Cake
Adapted from here.

Ingredients
1 cup + 1 Tablespoon cake flour
1 ½ cups granulated sugar
12 egg whites
1 Tablespoon warm water
1/2 teaspoon salt
1 teaspoon cream of tartar
1 teaspoon vanilla extract

Directions
1.       Preheat oven to 325 degrees F.
2.       Sift flour and ¾ cup of sugar 4 times into a bowl.
3.       In a large (non-plastic) bowl, beat egg whites and warm water until foamy (30 seconds).
4.       Add salt, cream of tartar, and vanilla, and beat on medium until soft peaks.
5.       Gradually add the remaining ¾ cup sugar while beating. Beat to stiff peaks on high.
6.       Sift flour mixture over egg whites in six parts and fold in with a spatula.
7.       Pour into an 8 inch ungreased cake pan and bake for 30 minutes or until toothpick comes out clean.
8.       Flip the cake pan upside down and balance the edges of the pan on cups (see picture).  Cool like this for 1 hour as it will ensure a high cake.  When completely cool, run a knife along the edge before unmolding.

*if you have extra batter, bake cupcakes for 16 minutes
After baking

Cooling upside down on (step 8)

Meringue
From previous post.

Ingredients
2 egg whites
½  teaspoon cream of tartar
1/8  teaspoon salt
½  teaspoon vanilla extract
½  cup sugar

Directions
1.       Preheat oven to 200 F. Trace 2 circles (of the cake pan from above recipe – I used 8 inch pans) onto parchment paper.  Place circle side down onto baking sheet.
2.       In a large metal bowl, beat egg whites, cream of tartar, and salt to soft peaks.
3.       Add vanilla and beat.
4.       Gradually add sugar and beat until stiff.
5.       Spread meringue into the circles on the baking sheet.
6.       For meringue decorations, line a piping bag with raspberry jam and fill with egg white mixture.  Pipe decorations on baking sheet.
7.       Bake for 1.5 hours or until they are thoroughly dry. Leave in oven with heat turned off for another hour.
Meringue lined with raspberry jam.

Before baking


Cake assembly
1.       Place first meringue layer on plate.  Apply lemon curd (I used store bought).
2.       Place angel food cake on top.
3.       Apply lemon curd on cake. Place meringue layer on top.
4.       Apply lemon curd on the meringue layer and decorate with raspberry meringue decorations.


Cupcake assembly
1.       Core cupcakes using a paring knife and fill with lemon curd.
2.       Place core back into cupcake, and spread a layer of lemon curd on top.
3.       Place a raspberry meringue decoration on top.
Cored cupcake


Verdict:  The cake was a perfect alternative to the cheesecake!  It turned out super fluffy and the meringues gave it a nice crunch!  The lemon curd gave it a tartness that complemented the sweetness and gave it flavor!  I am always amazed by how a simple cake with very little ingredients (and no fat) can be so tasty!